Deploying A/B split tests through Bitbucket Pipelines CI

Running A/B tests or experiments on the web requires injecting lots of JS and CSS into your web app to change the look and feel of the page. Reckless deployments of this code can (and sometimes does) break web applications. And when it does break, it results in failed experiments and terrible user experiences.

An example of a split testing container JS file with KBs of minified, experimental code.
But could we make experiment deployment safer and more reliable through a CI workflow? We think it's possible through how we use Bitbucket Pipelines.
Before Pipelines: Python CLI deployment scripts
Mint Metrics deployments in the early days consisted of building and publishing split test containers with a Python CLI script. The Python script worked fine - it handled linting, testing, minification and publishing to AWS S3.
But it was lacking in many ways:
- Python has limited JS linting, minification & other tooling - Some tasks were even unreliable, such as minification and testing
- No visibility over what code was running inside each environment
- Publishing containers was only possible locally - via a CLI on our laptops
- Rollbacks were a clunky process
None of these issues were road-blockers. They just made our lives more difficult when things sometimes hit the fan.
Enter: Bitbucket Pipelines for git/CI deployment
But in early 2019 we learned about Bitbucket Pipelines - we were long-time Bitbucket users and so decided to give it a crack. After a quick planning session, we managed to setup a fully functioning Pipeline and port everything over to a JS build process!
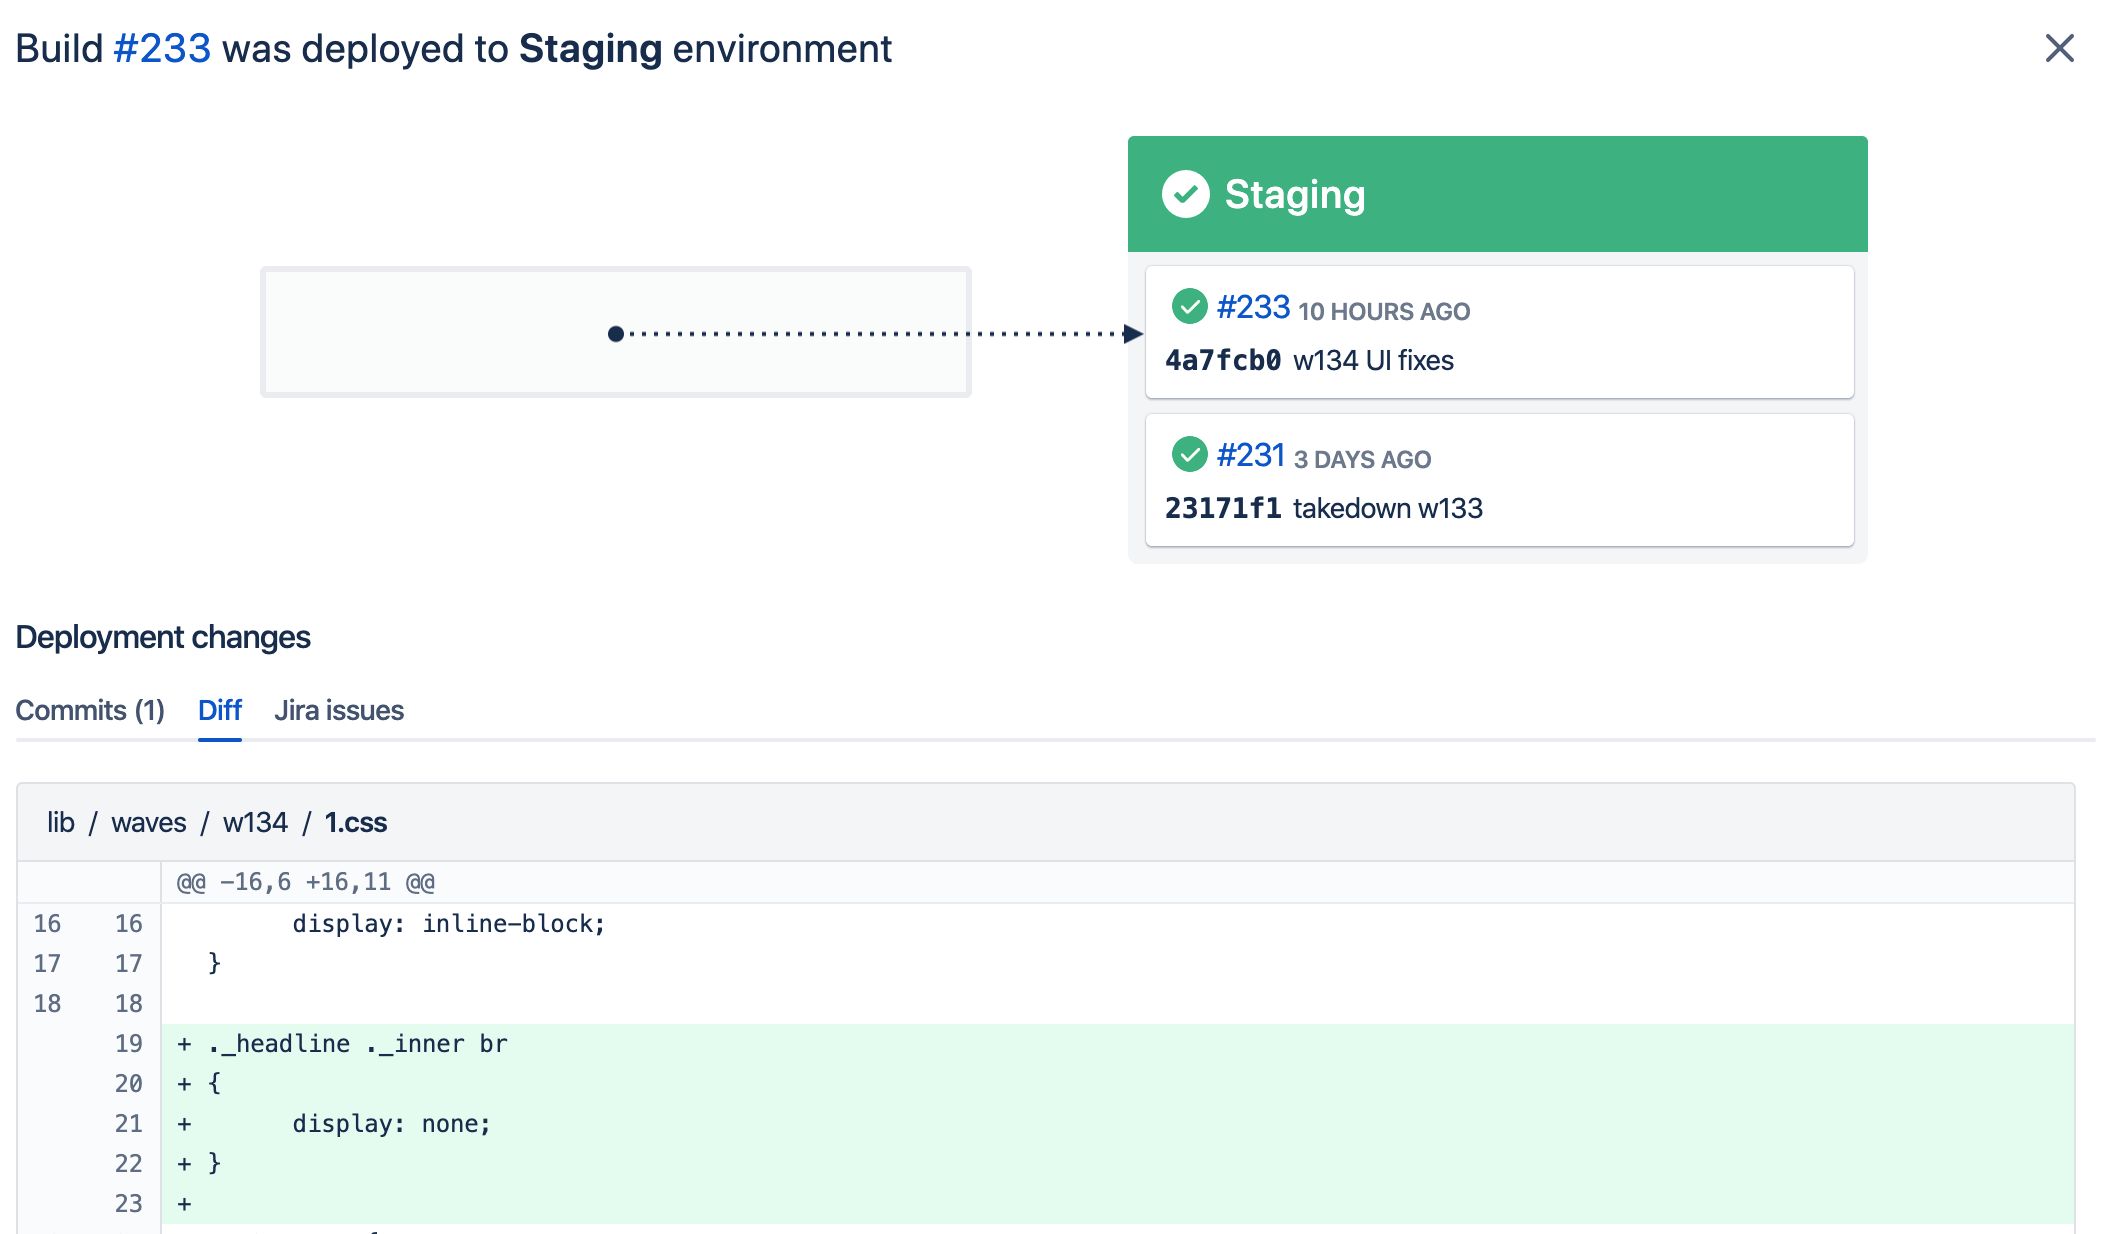
Track each commit as it is built & published to each environment.
Rather than publishing via the CLI, Bitbucket Pipelines could build and upload to S3 right after every commit. No infrastructure needed! And everyone with write access to the repo could manage deployments. We need only provision AWS creds to our shared Bitbucket users.
Impressed with our MVP, we evolved the pipeline to handle more work. Here's the full YAML:
image: atlassian/default-image:2
pipelines:
  branches:
    master:
      - step:
          name: Build & publish to production
          deployment: production
          caches:
            - node
          script:
            - npm install
            - npm install -g gulp-cli
            - gulp build
            - gulp publish --awsk $AWS_ACCESS_KEY_ID --awss $AWS_SECRET_ACCESS_KEY --production
      - step:
          name: Invalidate Cloudfront objects
          script:
            - pipe: atlassian/aws-cloudfront-invalidate:0.1.3
              variables:
                AWS_ACCESS_KEY_ID: $AWS_ACCESS_KEY_ID
                AWS_SECRET_ACCESS_KEY: $AWS_SECRET_ACCESS_KEY
                AWS_DEFAULT_REGION: $AWS_DEFAULT_REGION
                DISTRIBUTION_ID: '$AWS_CF_DISTRIBUTION'
                PATHS: '$AWS_CF_PATHS'

    development:
      - step:
          name: Build & publish to staging
          deployment: staging
          caches:
            - node
          script:
            - npm install
            - npm install -g gulp-cli
            - gulp build
            - gulp publish --awsk $AWS_ACCESS_KEY_ID --awss $AWS_SECRET_ACCESS_KEY
Breaking down the example pipeline
The Production Pipeline above roughly translates to:
1. Install package Node modules & Gulp CLI
Pull down the relevant node modules to build and test your Mojito container.
2. gulp build creates the container
This command takes all active tests inside lib/waves/*/test-config.yml and builds them into the container:
- Tests defined in YAML are parsed and built into the container
- The whole container is then linted and uglified to minimise its weight
- The container is output to
dist/assets/js/mojito.js, so it's ready to publish
3. gulp publish deploys it to AWS S3
Once built, the containers are gzipped and uploaded to AWS S3 Buckets. We set cache control headers to balance page speed with clients ability to fetch the most updated version of a container.
gulp publish --awsk $AWS_ACCESS_KEY_ID --awss $AWS_SECRET_ACCESS_KEY --production
And here, you'll note your AWS credentials are safely stored in your Bitbucket repo bust masked appropriately throughout the interface.
4. (Production-only pipelines) Cloudfront Invalidation
With the new container published, this step tells Cloudfront edge nodes to fetch the latest version. But this is just a precaution since Edge nodes usually respect your cache-control headers, too.
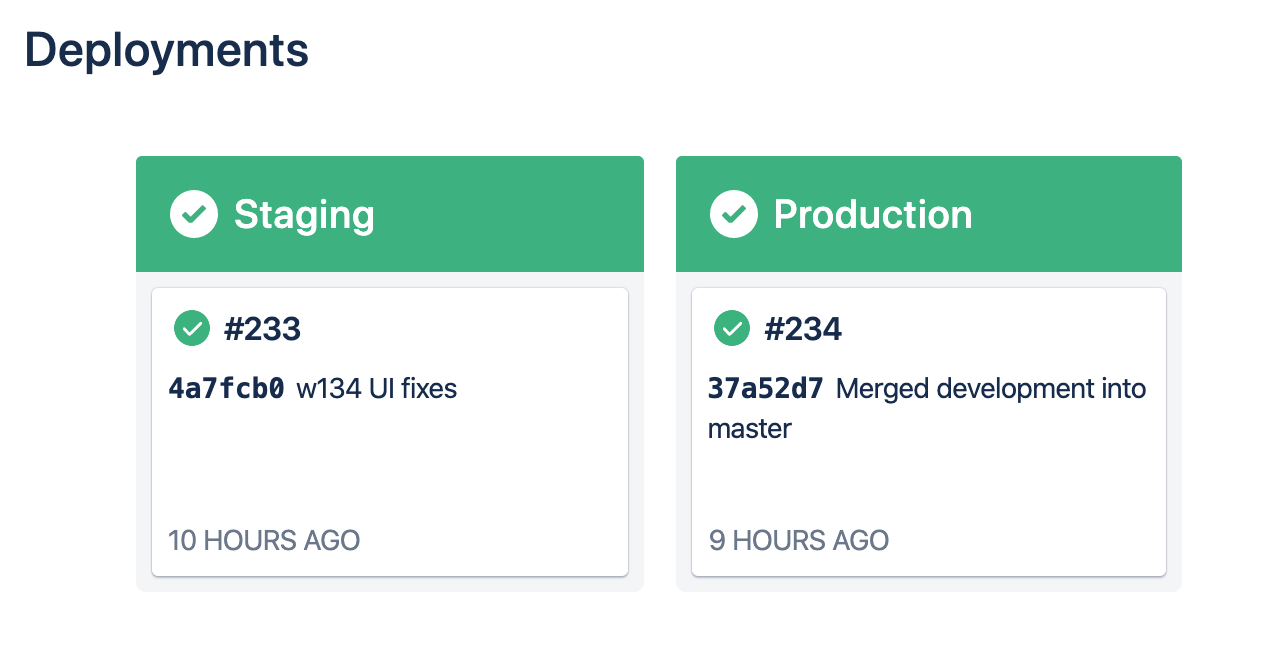
Configuring Bitbucket Pipelines environments & branches
We setup two environments for the two branches we mostly use:
Staging:developmentbranchProduction:masterbranch
Staging is meant for testing code in our development branch. And Production only receives code that's been tested and ready to deploy from our master branch.
Environments give us some useful features, like:
- Track which code is running in an environment
- Secure production credentials to users with repository/branch write access
- Provide environments for testing & QA
Here's an example of a working test we published for preview.
Most deployments take about 30 seconds
And since Bitbucket gives you 50-build-minutes on free plans and 2,500-build-minutes on standard plans, you'll have virtually limitless build time for building and testing.
Extensibility & future work
We have lots of ideas we'd like to implement for our experiment deployments. Since, Pipelines are all just Docker containers, they're highly extensible. We could build features like:
- Automated screenshotting & visual experiment comparisons
- Unit testing that validates live tests' variant code is working properly
- Automatically updating live experiments' sample rates for gradual ramp-up and Multi-armed bandit algorithms